#56 · Jira Integration - Send Remediation Info to Your Developers
Bridging the gap between security and development has never been easier. Security teams can now automatically share actionable vulnerability information with pre-filled remediation steps, saving time and ensuring faster resolution. No more back-and-forth—your developers can hit the ground running with the fix already in hand.
Getting started
- Login to the Escape UI and navigate to Integrations.
- Select Jira.
- Click New Integration and confirm the Authorization request.
- Give your integration a name for easy identification.
- Enter your Jira instance URL (e.g.,
https://escape.atlassian.net/). - Attach relevant Tags to ensure proper linkage with applications in Escape.
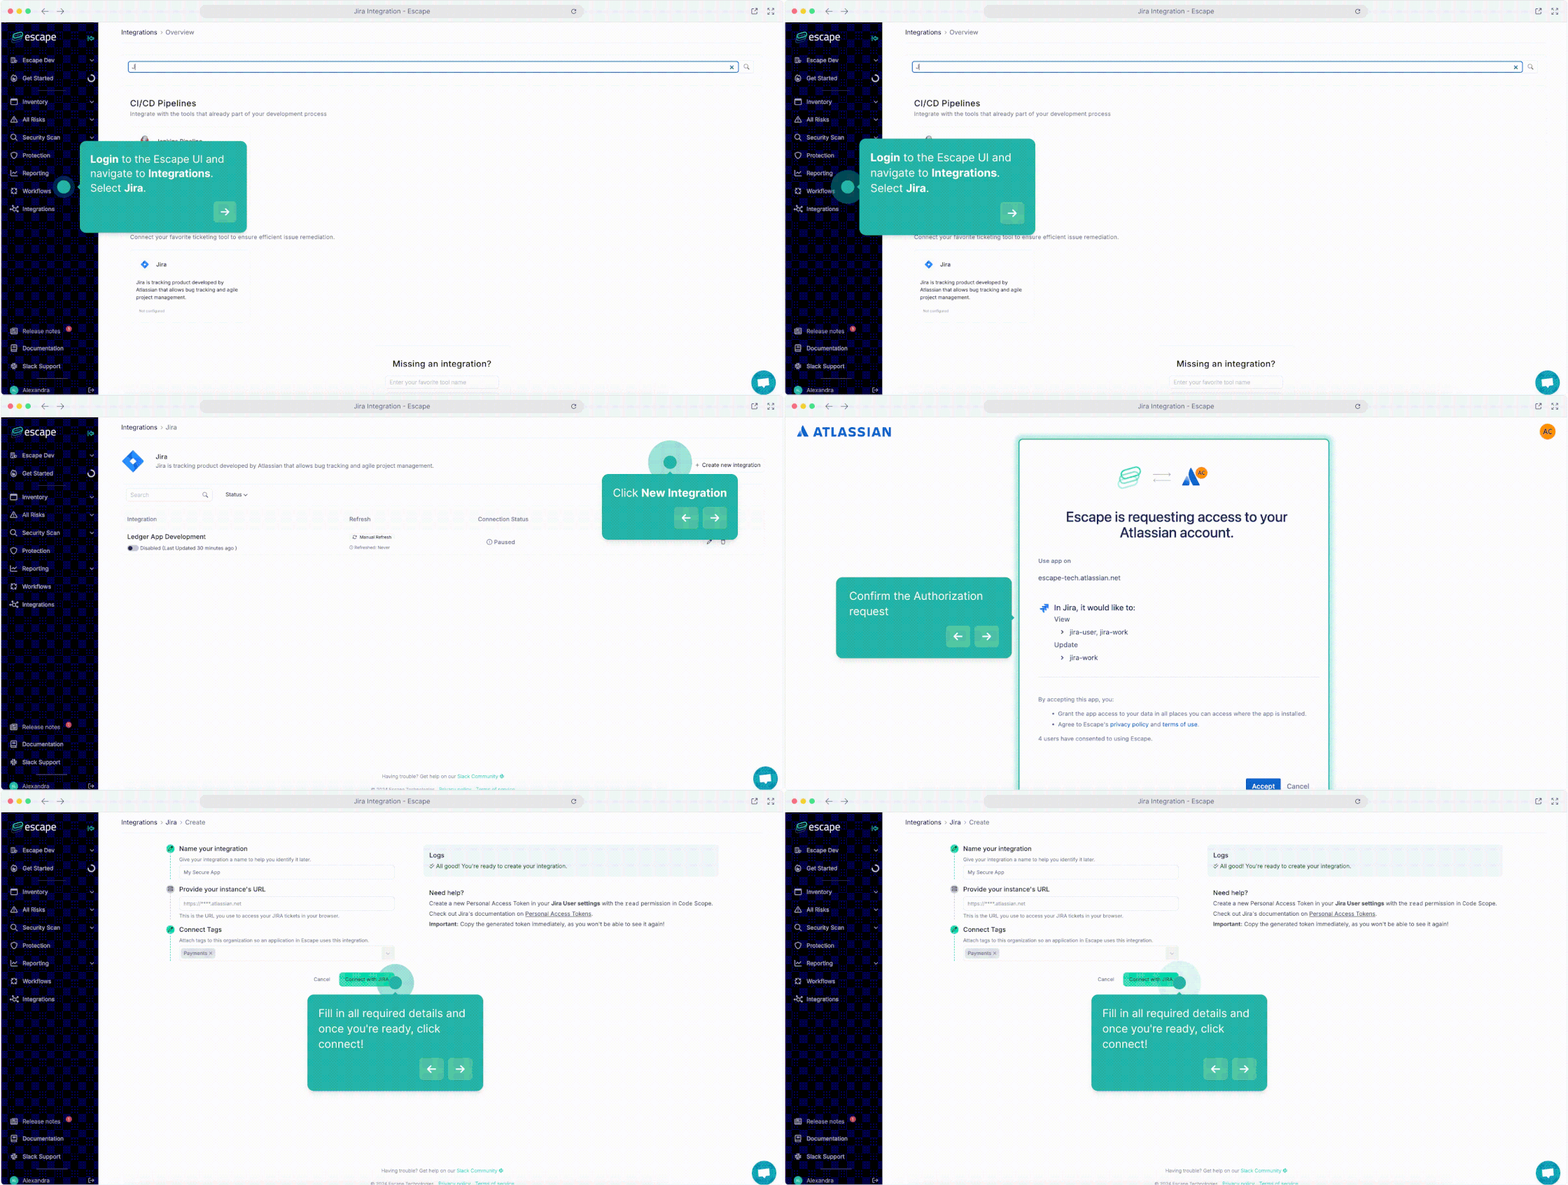
You can create as many integrations as you wish for each application label.
How to Create a New Jira Ticket:
- Go to Tested Applications in Escape.
- Select the application with the relevant vulnerability.
- In the Issues Tab, click on the issue you need to address.
- Choose the appropriate Remediation Framework.
- Click More, then go to the Ticketing Tab.
- Select the Project and Issue Type (Task or Asset).
- Add additional information to the auto-generated Summary. & Description (if necessary)
- Set a Due Date
- Click on Create Ticket. and that's it!
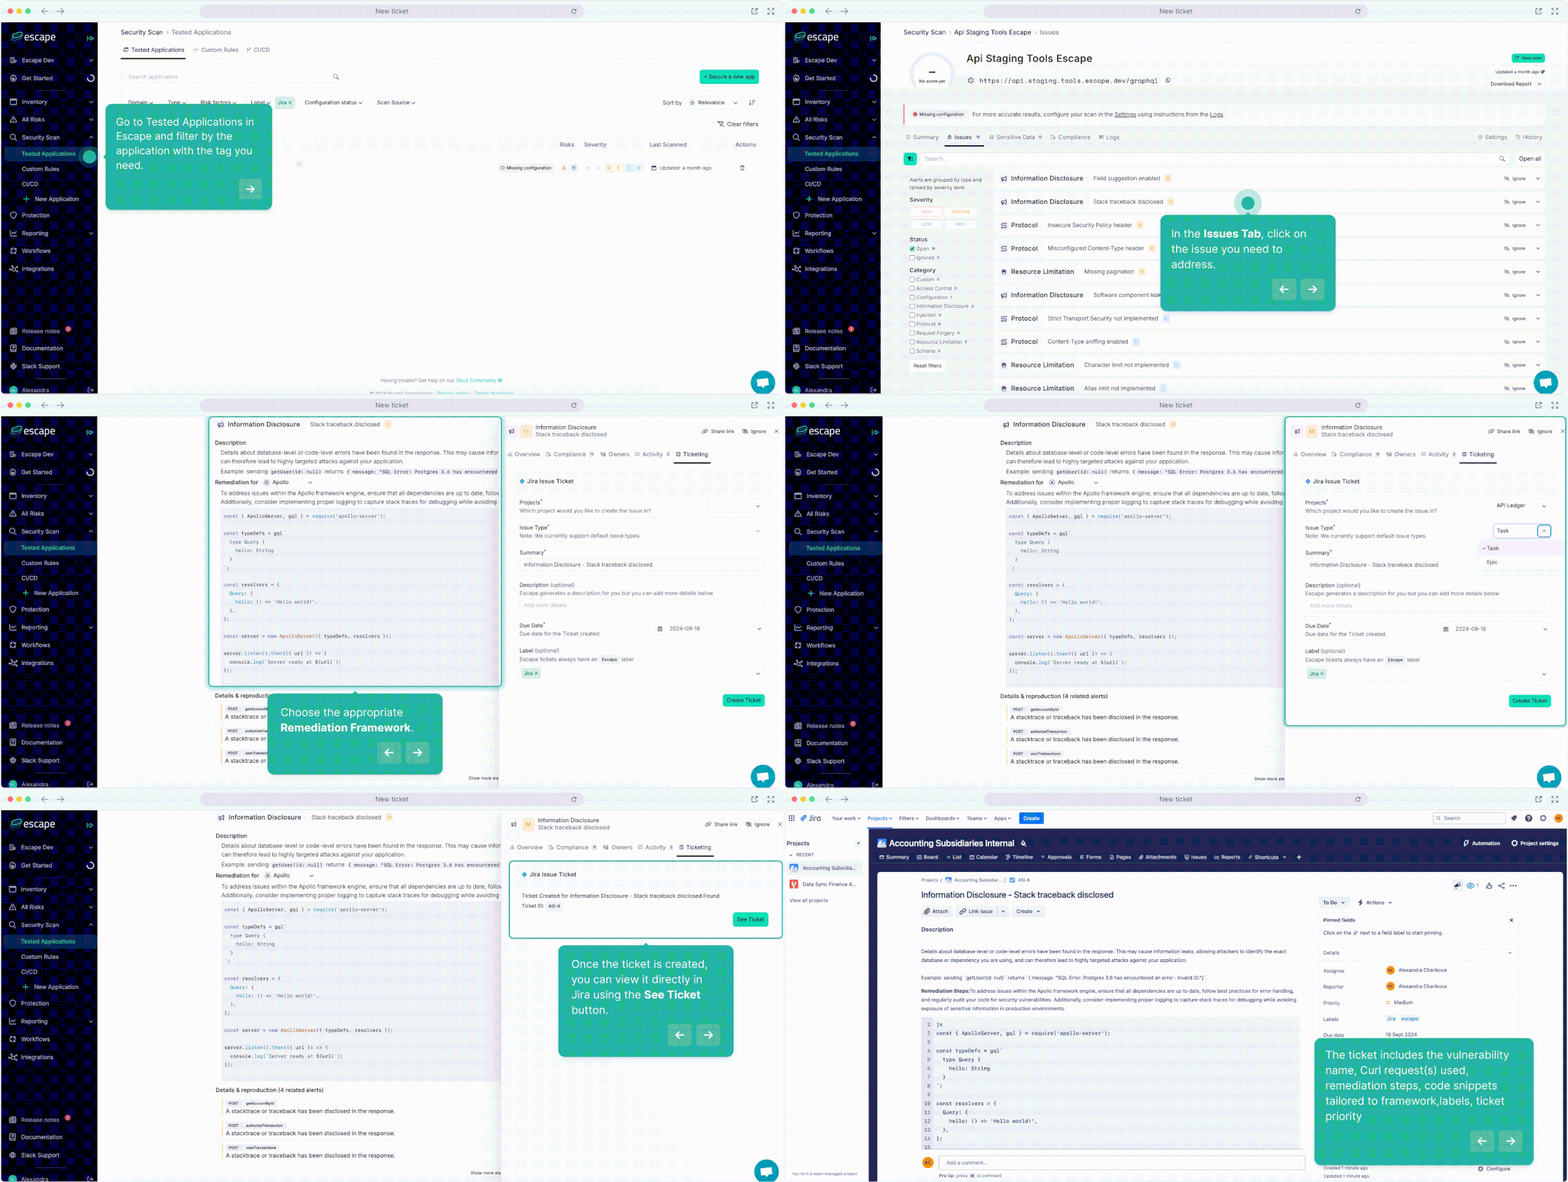
Once the ticket is created, you can view it directly in Jira using the See Ticket button. The ticket includes:
- Vulnerability name (e.g., Broken Object Level Authorization (BOLA)).
- Curl Request(s) used
- Remediation steps
- Relevant code snippets tailored to framework
- Associated application labels
- Adjustable ticket priority
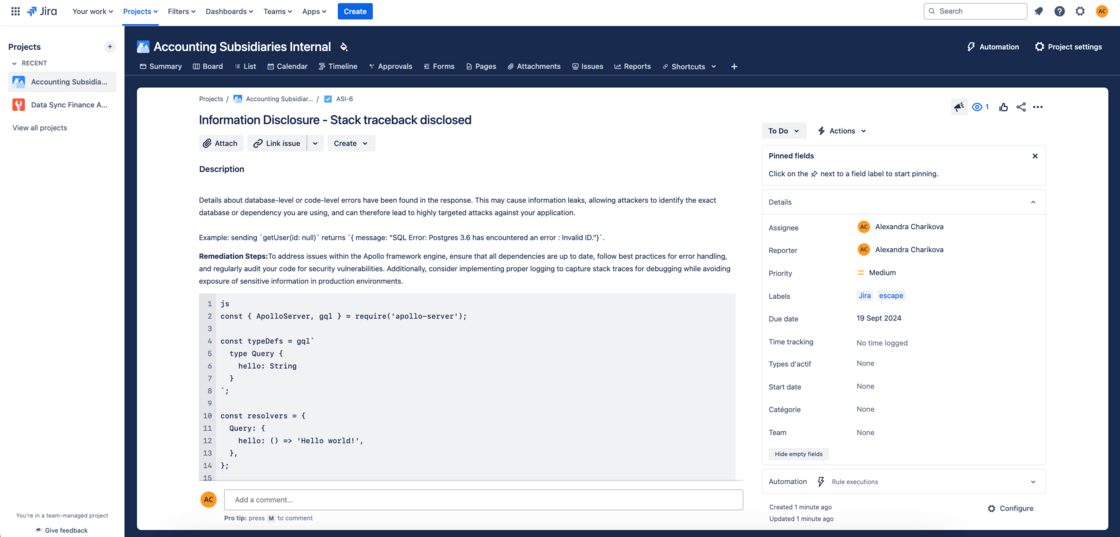
With this new integration, you should be able to accelerate your remediation process and keep your developers focused on what matters most—delivering secure applications faster.