#105 · From Alert to Action: Improved Jira Integration
We are excited to introduce an enhanced Jira integration designed to make your vulnerability management process even more seamless and efficient.
When setting up your Jira integration, you can now create multiple templates for ticket generation. Each template lets you specify the issue type, mapped to your organization's ticket types (e.g., Task, Subtask, Bug), and align Escape’s severity with your organization’s priority levels.
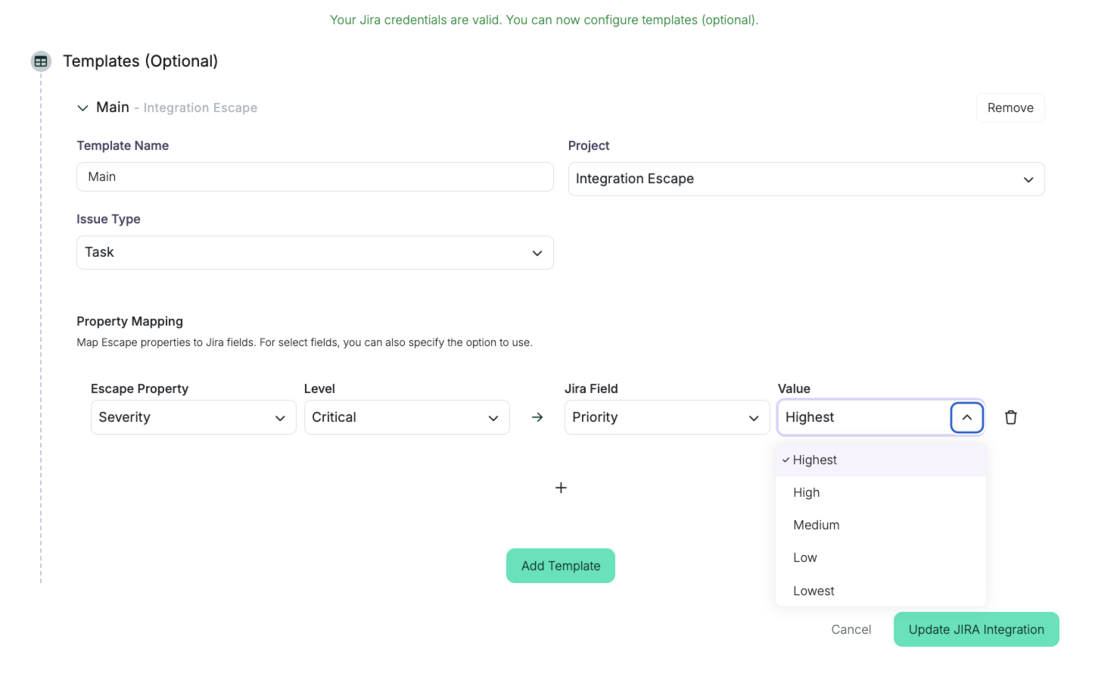
Additionally, the templates will prefill most of the necessary information when creating a Jira issue from Escape, including
- the issue name
- description
- cURL request(s) used
- detailed remediation steps with a tailored development framework
- a link to the scan
This ensures that every ticket is consistently created with relevant and accurate details each time.
We also hope that the ability to map Escape’s severity to your internal priorities will help you to streamline risk management, ensuring that your team can react swiftly based on your established thresholds!
How to Set Up the Integration:
If you haven’t set up the Jira integration yet, here’s how you can get started:
- Go to the Integrations Page: Click on Jira.
- Choose Add New Integration.
-
Configure your integration:
-
Name your integration.
- Add your Jira instance URL and API key.
- Enter the linked email associated with your Jira account (the one used to generate the API key).
- Validate Credentials: Click Validate Credentials to ensure your connection is working properly.
4.Once the credentials are validated, you can create and manage multiple templates.
The templates allow you to customize key fields such as:
- Name
- Project Name
- Issue Type (based on the available types in your Jira instance)
- Escape Severity Mapping to your internal priority system
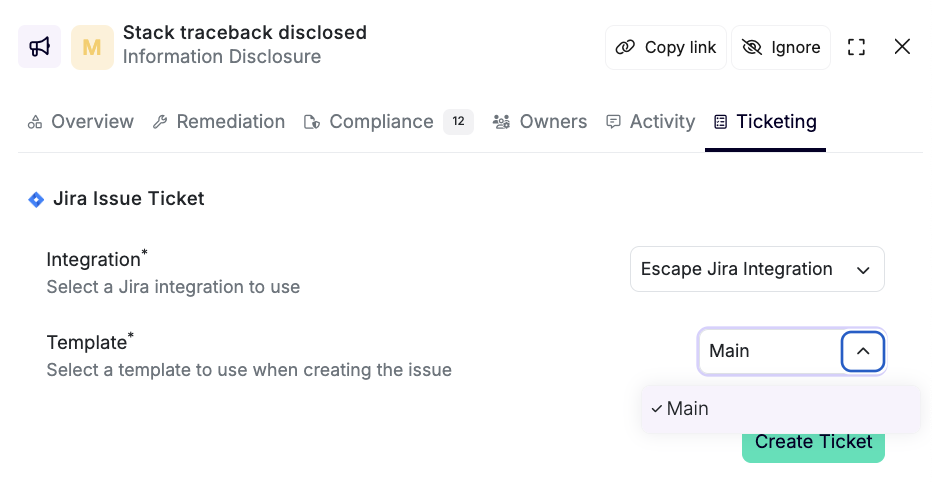
Select and Associate a Template to Create and Send Jira Tickets
Once you've set up your templates, when you create a ticket associated with a vulnerability, you can easily select the appropriate template from the list you’ve created. This allows you to quickly send the preconfigured ticket to Jira with the correct issue type, severity, and all other relevant details.
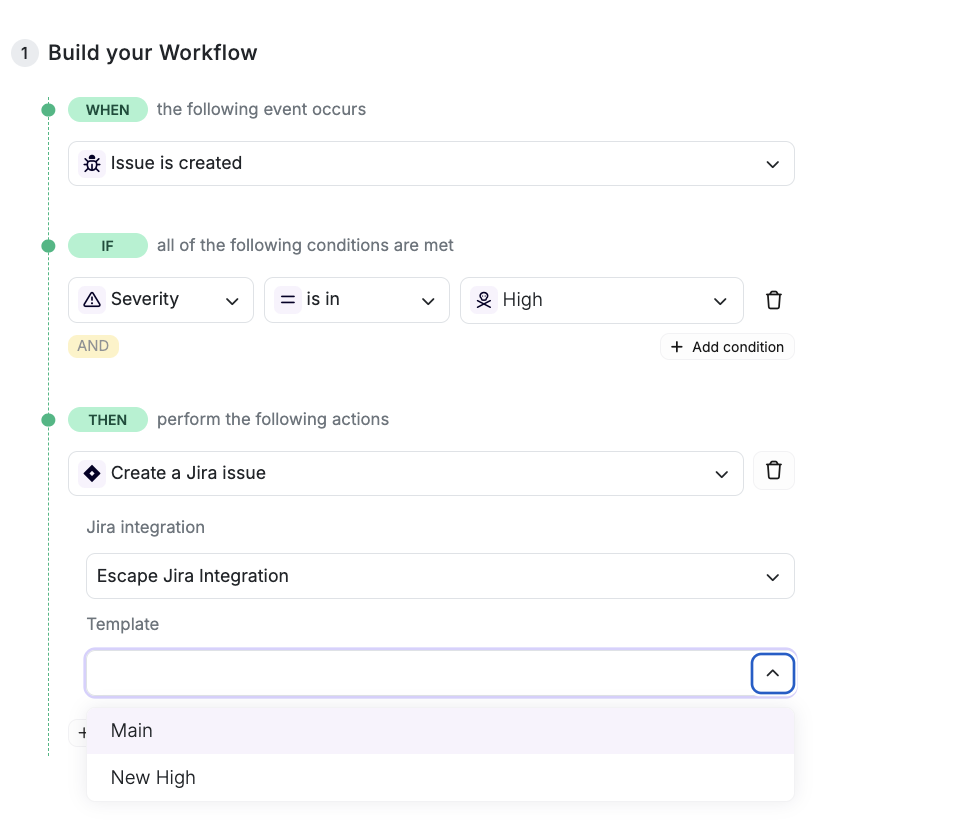
Using Templates in Workflows:
One of the best parts of this update is the ability to use your templates directly within Escape’s workflows. For example, when a critical vulnerability is detected, you can automatically create a Jira ticket with the associated template. This helps you respond to high-risk issues promptly and ensures that all the necessary details are included from the get-go.
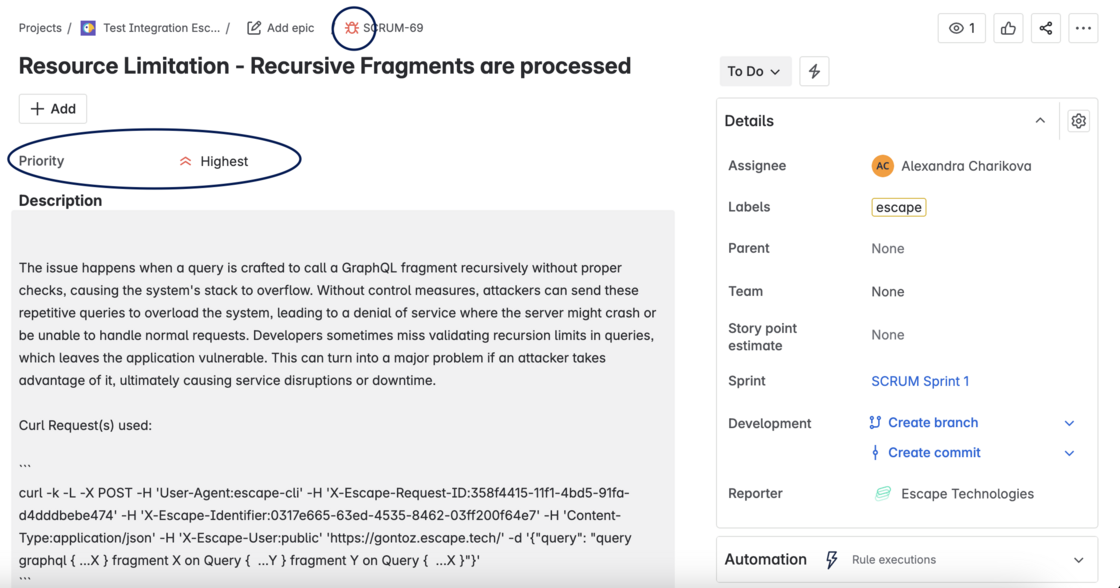
On the Jira Side:
When the issue is created in Jira, you’ll see the pre-configured issue type and severity level mapped to your internal system, so everything is in place as per your organization's standards.
With this update, we hope to help you make it easier than ever before to turn critical alerts into actionable Jira tickets. The next steps will provide even more flexibility when it comes to property field mapping.
Want to help improve our Jira integration? Reach out to our team via your dedicated Slack channel or email your dedicated contact!