AI Pentesting Quickstart
How AI Pentesting Differs from DAST
AI Pentesting runs on Cascade, Escape's multi-agent pentest engine. It uses adaptive AI agents that reason about application behavior and adapt their testing strategies in real time. DAST uses rule-based systematic testing with predictable coverage patterns.
Use AI Pentesting when you need:
- Deep, adaptive testing that reasons about application behavior
- Complex vulnerability discovery requiring multi-step attacks
- Authorization testing with context understanding
- Business logic flaw detection
Use DAST when you need:
- Systematic, repeatable rule-based testing
- Fast CI/CD integration
- Comprehensive coverage of known vulnerability patterns
- Custom rule enforcement
AI Pentesting explores your application, reasons about context, and attempts multi-step attack scenarios such as authorization bypass and business logic abuse.
This guide walks you through prerequisites, your first assessment, and how to interpret results.
Prerequisites
Before running your first AI Pentesting assessment, ensure you have:
- An Escape account: Sign up at app.escape.tech
- Access to AI Pentesting enabled for your organization
- A reachable HTTPS target URL for the application or API you want to test
- Authentication credentials (if required)
If AI Pentesting is not enabled for your organization, the creation form shows a paid-feature message. Contact your Escape representative to enable it.
Safety & Production Usage
AI Pentesting is designed to run safely against production environments.
It:
- Respects rate limits
- Avoids destructive payloads
- Does not perform destructive actions
- Limits proof-of-concept impact to validation only
If testing in production:
- Ensure you have proper authorization
- Configure rate limits
- Use test accounts when possible
First Run
Step 1: Open the New Pentest Form
- Open AI Pentesting.
- Click New Pentest to open the creation form.
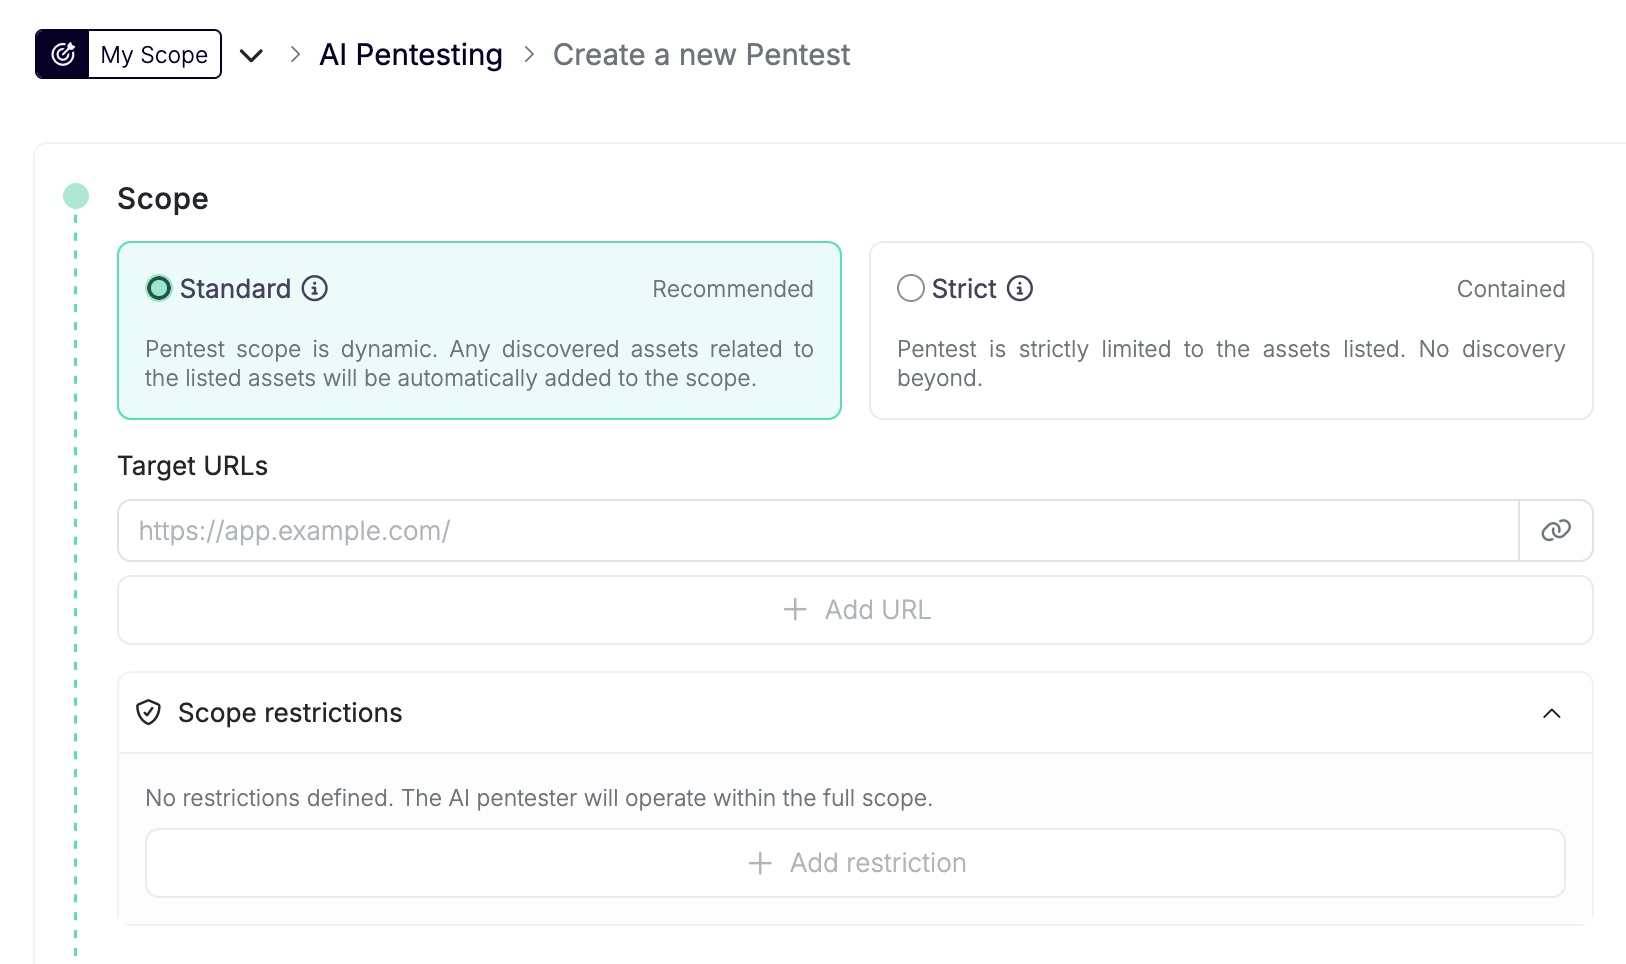
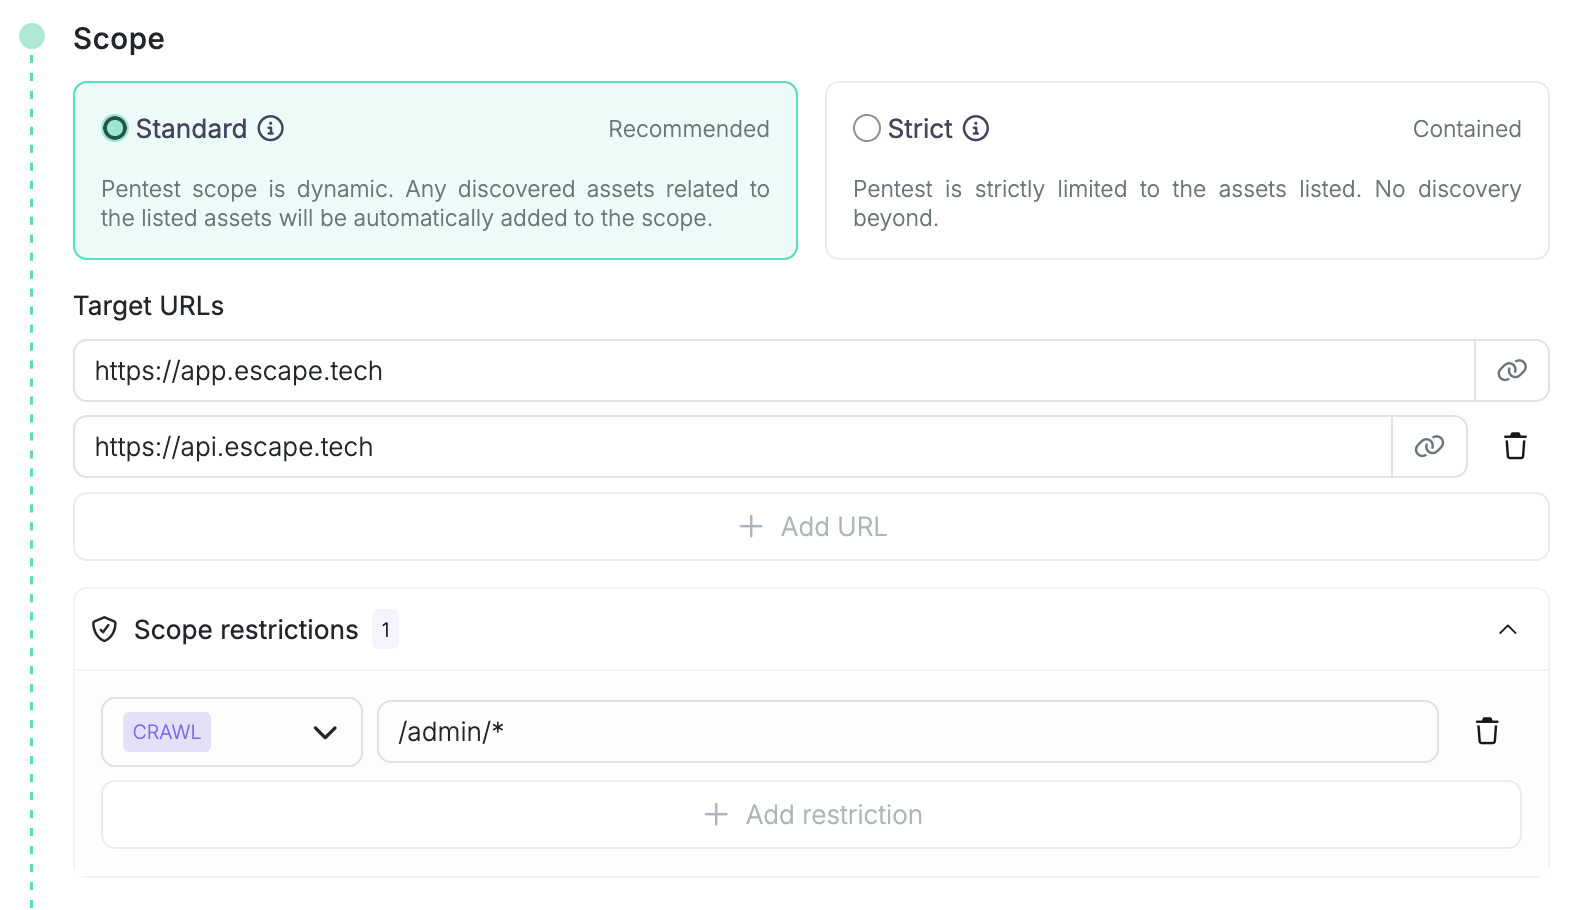
Step 2: Configure Scope
The Scope section defines what Escape is allowed to test. See Scope for the full reference.
- Choose the scope mode:
- Standard (recommended): Escape will test the target URL and any API behind the frontends (excluding third-party APIs like Stripe, Sentry, etc.).
- Strict: Escape will only test the target URL, any network requests to APIs not in the target URL will be blocked (may break the frontend).
- Enter the primary target URL.
- Add extra URLs when the application spans multiple frontends, APIs, or related hosts.
- Optionally add scope restrictions (URL or GraphQL blocklist).
Escape validates and classifies the target during the review section. You do not need to choose WebApp, REST API, or GraphQL API manually.
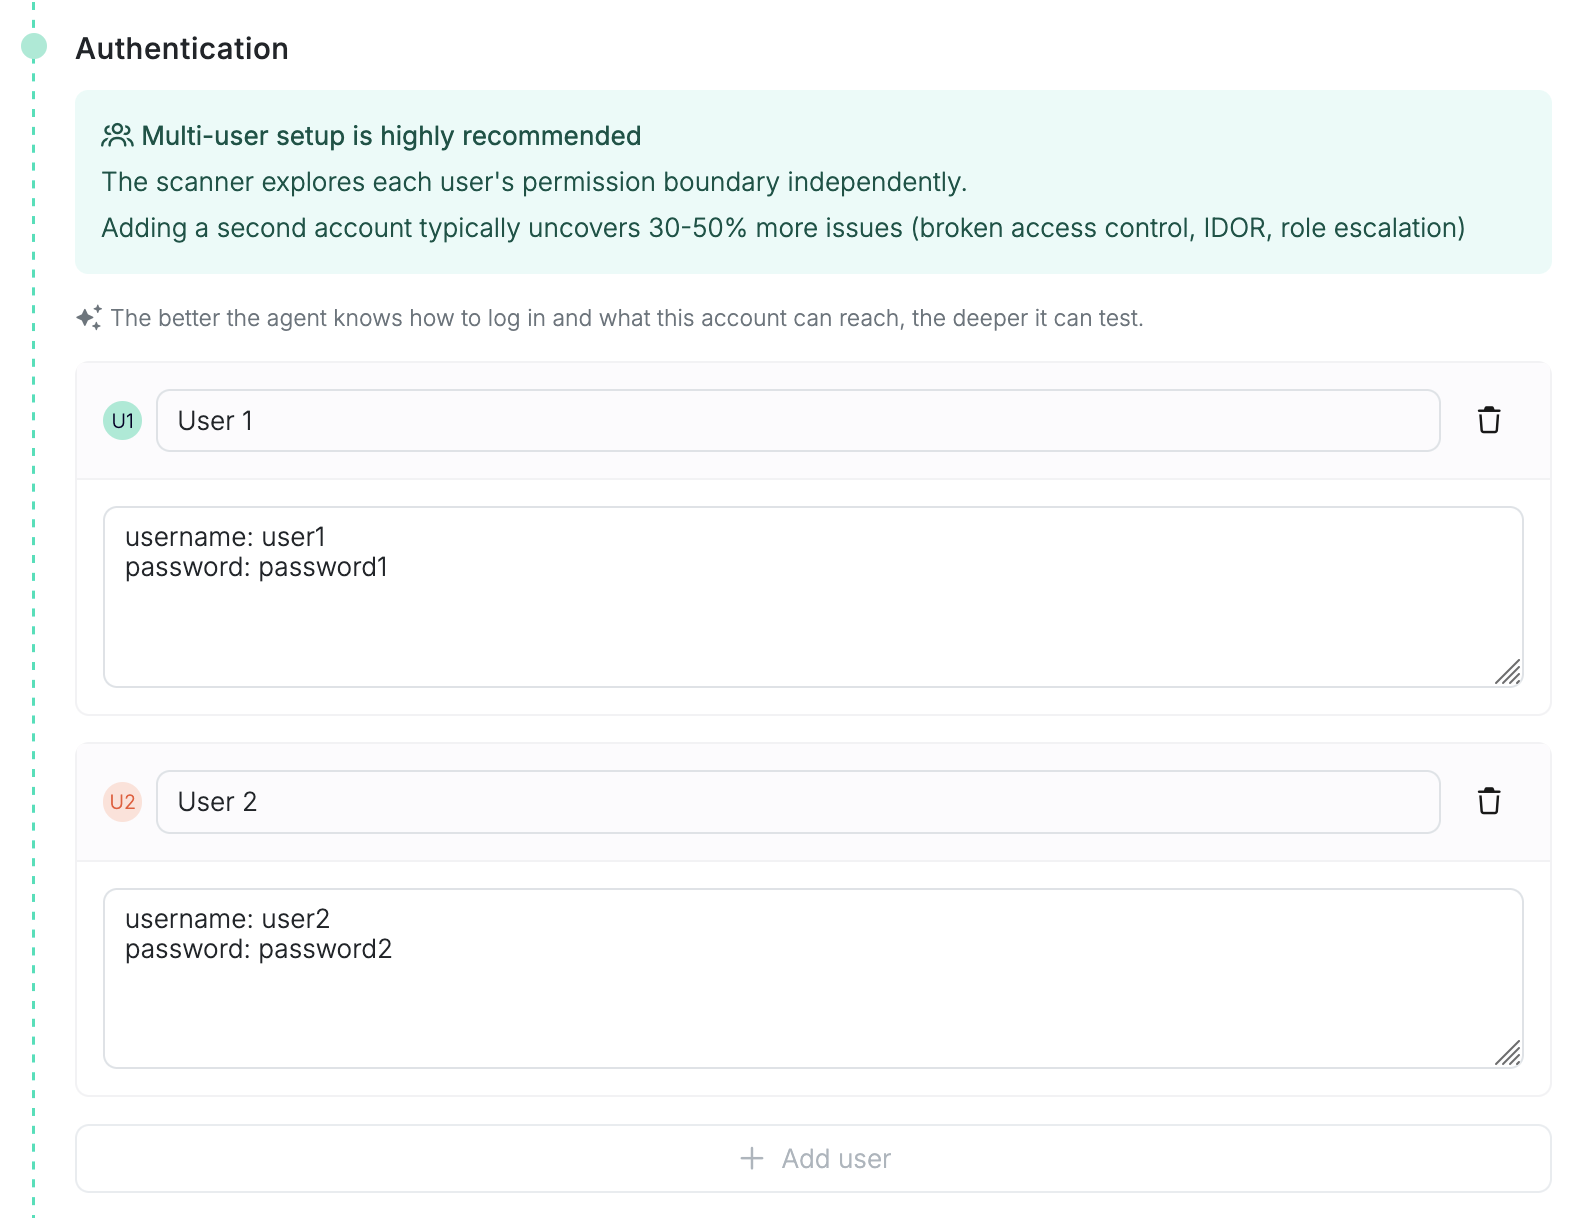
Step 3: Configure Authentication
The Authentication section tells the agent how to sign in and what each account can access.
For each user, provide:
- A name or email, such as
admin@example.com - Natural-language sign-in instructions, such as the login URL, credentials, MFA or TOTP notes, SSO details, and expected post-login state
Leave the user list empty only when the target is public. For authorization testing, add at least two users with different roles or tenants. The agent explores each user's permission boundary independently, which is what makes BOLA, IDOR, and privilege-escalation testing useful.
For background on supported authentication patterns, see Authentication Configuration. In the New Pentest form, the primary setup path is the per-user instruction field.
Step 4: Fine-Tune Optional Settings
The Fine-Tune (Optional) section lets you add context and execution controls.
- Context: Add scope hints, business context, sensitive workflows, and areas to avoid. The UI accepts up to 4000 characters.
- Location: Run from an Escape public region or from a Private Location for internal applications.
- Duration: Set a maximum duration from 6 to 24 hours and a rate limit from 1 to 500 requests per second.
- Artifacts: Attach pentest reports, documentation, or source-code archives. Common file types are supported, including PDF, images (screenshots), plain-text and structured files (OpenAPI, Postman, HAR, Markdown, source code), CSVs, and archives. The Regression Testing Agent uses uploaded PDF reports to replay previously reported vulnerabilities.
The default setup is a 10-hour run, 500 requests per second, and the Europe public location.
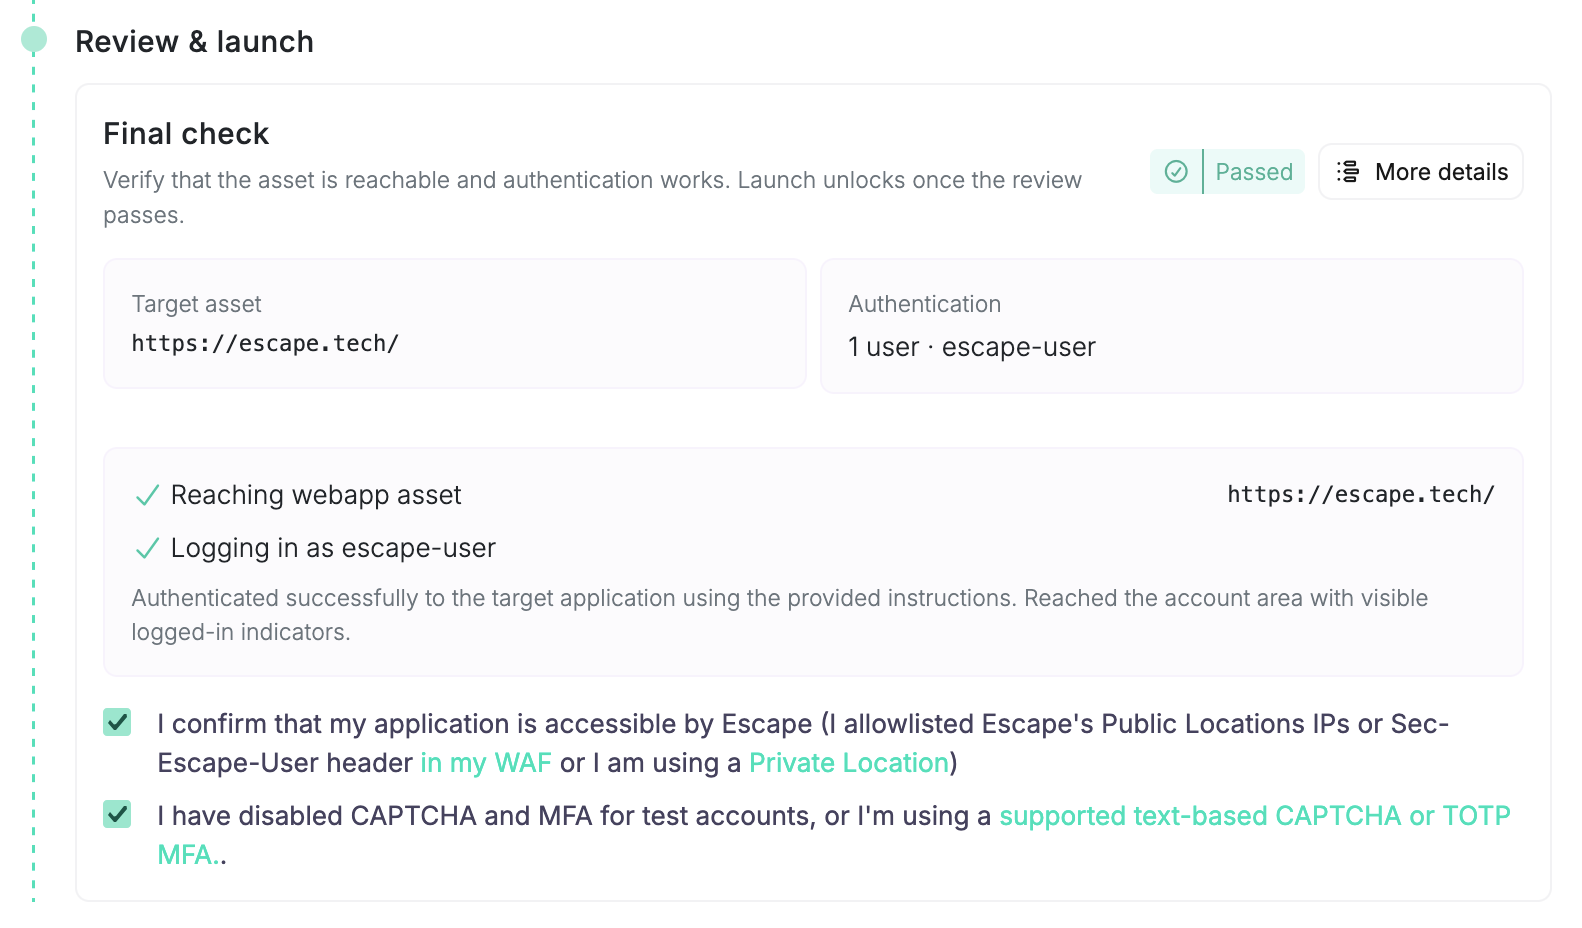
Step 5: Review and Launch
The Review & launch section is the pre-flight check before the assessment starts.
- Confirm that the application is reachable by Escape, either through WAF allowlisting, the
Sec-Escape-Userheader, or a Private Location. - Confirm that CAPTCHA and MFA are disabled for test accounts, or that you use a supported text-based CAPTCHA or TOTP MFA flow.
- Click Review configuration.
- Wait for validation to pass.
- Click Launch pentest.
- Confirm the launch in the modal.
The validation run checks reachability, classifies the listed URLs, and tests authentication for each configured user. Launch pentest stays disabled until validation finishes successfully.
The final confirmation summarizes the target, extra scope, users, location, duration, rate limit, scope mode, and attached artifacts.
What Runs After Launch
Escape starts with a crawling phase. The crawler explores the target, maps reachable pages and endpoints, and gathers the traffic context the pentest needs.
After crawling, Cascade takes over. An orchestrator plans the engagement, spawns focused worker agents on demand, and shares context between them based on what the crawler found. A reporter agent independently re-verifies each candidate finding before it's filed.
Cascade spins up the specialists a target needs, which can cover:
- Access control: BOLA, IDOR, and privilege escalation across the configured users
- Cross-site scripting: reflected, stored, and DOM-based XSS
- SQL injection: reconnaissance and targeted exploitation
- Business logic: workflow and state-transition flaws
- Additional classes such as SSRF and command injection, depending on context and configuration
No manual agent selection is required for a first run.
Monitor Your Assessment
After launch:
- Monitor assessment progress in real time.
- Review agent logs and reasoning in the assessment details. See Proof of Exploit.
Stopping a Running Assessment
If you cancel an AI Pentesting assessment from the UI, CLI, or API, Escape immediately stops the active pentesting agent for that assessment.
Use cancellation when:
- The agent is exploring the wrong area
- You need to change authentication or assessment scope
Organization admins can also enable Cancel all current AI Pentesting scans and prevent all AI Pentesting scans from being started in Organization Settings > Scan Kill Switches. When this kill switch is enabled, Escape cancels running AI Pentesting assessments and blocks new or scheduled AI Pentesting assessments until the setting is disabled again. See Guardrails.
What Makes AI Pentesting Different?
Unlike traditional rule-based testing, AI Pentesting:
- Adapts its strategy dynamically
- Chains multiple requests to validate real impact
- Tests authorization boundaries across multiple roles
- Explores business logic instead of matching static patterns
This enables discovery of complex, multi-step vulnerabilities.
How to Read Results
AI Pentesting findings include:
- Vulnerability type and severity
- Concrete evidence (requests and responses)
- Agent reasoning logs (see Proof of Exploit)
- Clear reproduction steps
- Remediation guidance
Severity
Each filed issue carries an Escape Severity rating (Critical, High, Medium, Low, Info). Cascade assesses severity from the confirmed attack chain's CVSS 4.0 baseline and adjusts for exploitability in your environment—authentication context, sensitive data exposure, and API-specific risk. The reporter agent must independently reproduce the exploit before the finding is filed; CVSS score and vector are shown on every confirmed issue.
Findings the reporter cannot reproduce are not filed at full severity.
Common First-Run Issues
No Findings
- Review agent logs to confirm coverage. See Proof of Exploit.
- Verify authentication is correctly configured
- Ensure your target scope is accessible
Authentication Failures
- Confirm credentials are valid and not expired
- Review the Authentication section instructions for each user
- Review authentication logs for errors
Slow Assessments
- Review rate limits
- Reduce scope if testing a large application
- Adjust timeout settings if necessary
For advanced troubleshooting, see: How It Works
Related Documentation
- How It Works
- Scope: Standard vs Strict, restrictions, and enforcement
- The Cascade Engine: Architecture, skills, and limits
- Authentication: Supported authentication patterns
- Private Locations: Test internal applications
- DAST Configuration: API testing configuration options
- Frontend DAST Configuration: WebApp testing configuration options