Include Extra Data in the Scan
Overview
When creating a new scan profile, you can include extra assets to be used while scanning the profile's target asset.
Supported Extra Assets
The UI supports selecting schemas. The API and CLI accept asset IDs for linking extra assets to a profile. To provide REST and GraphQL API definitions to the scanner, attach schema assets. Choose extra assets that match your scan type.
Linkage Model
Under the hood, Escape will keep track of how assets are bound to each other in your ASM, and it will separately keep track of what assets are additionally used in each profile.
Asset Definitions
In the ASM, it's possible to attach assets as a definition of another asset. This is done by linking the two assets together at the ASM level.
Profile Extra Assets
A profile is dedicated to scanning a single target asset. This target asset can be defined by multiple different assets, including schemas, related services, and repositories.
The profile leverages a subset of the target asset's definition assets, in order to provide additional data to the scan. The extra assets of the profile are cherry picked among the target asset's definition assets.
Bypass
Alternatively, you can choose to use all of them, in this case, every future scan of this profile will use all the target asset's definition assets.
Usage in the UI
During Profile Creation
When creating a new scan profile, you can include extra assets to be used while scanning the profile's target asset. You can do so by selecting the assets you want to include in the "Input your API schemas" step.
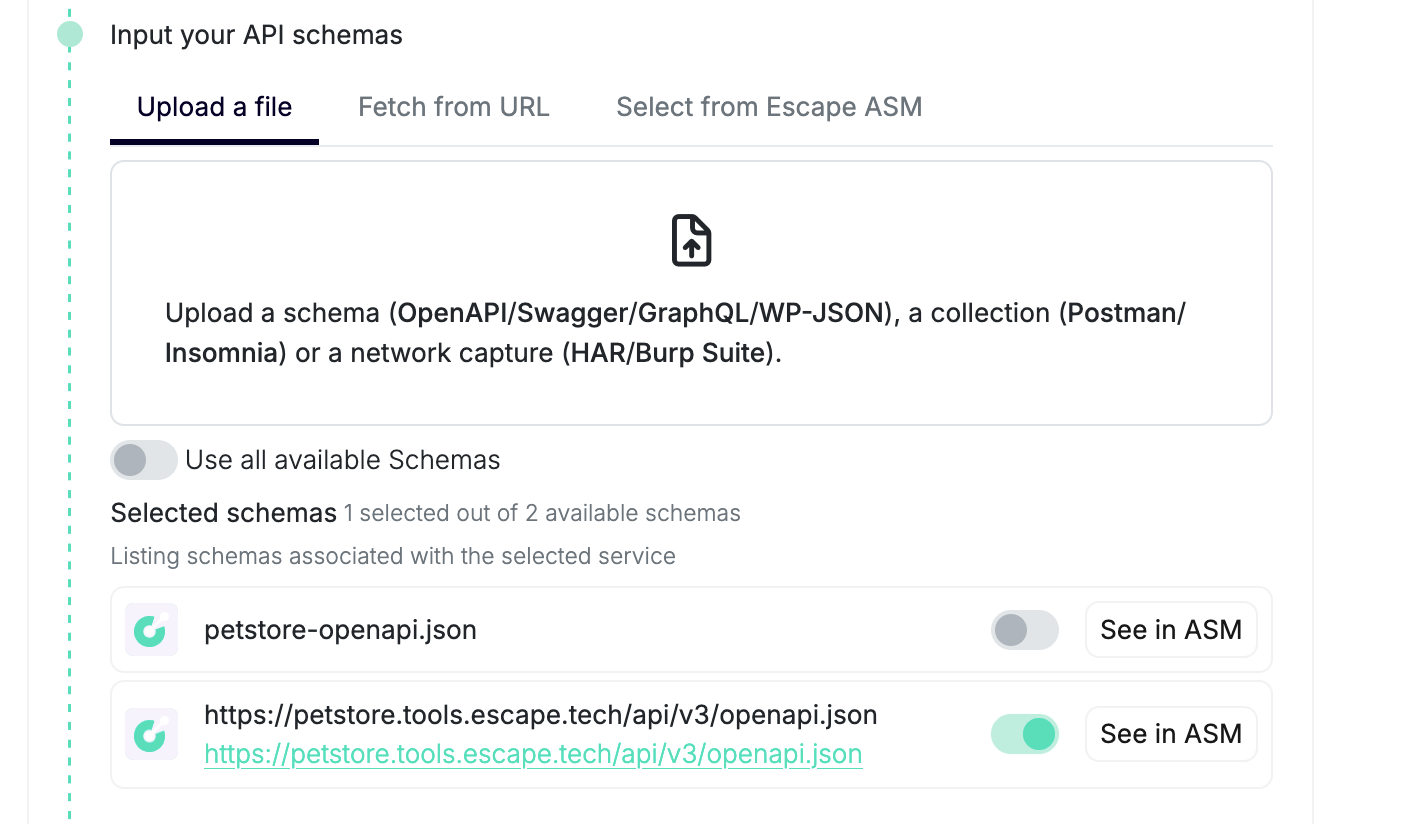
You can also choose to use all the target asset's definition assets by checking the "Use all available Schemas" checkbox.
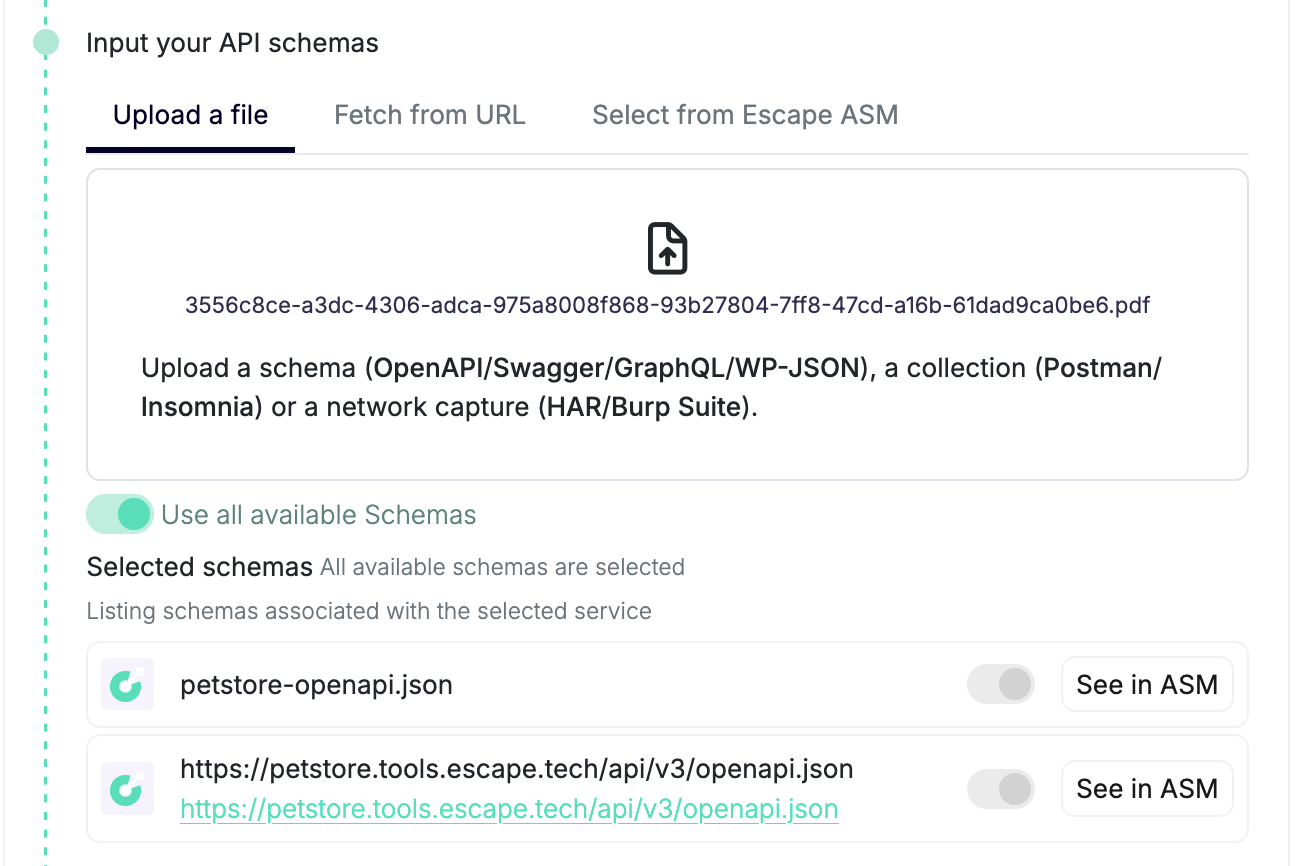
You can also create assets on the fly from this utility and have them immediately linked to the target asset, and used in the profile.
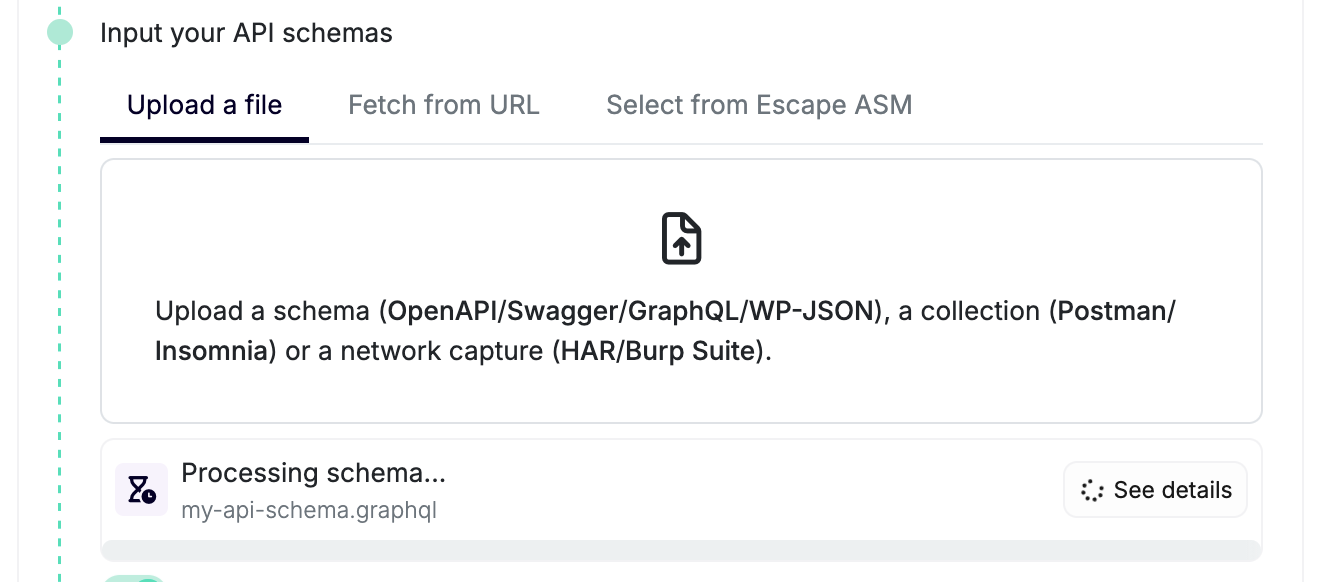
When creating the profile, you're offered to pick extra assets among all of the target asset's definition assets. To add a displayed asset to the extra assets of the created profile, a switch can be enabled or disabled.
Default Behavior
Assets created through this UI are automatically linked to the target asset, and used in the profile.
Editing an Existing Profile
On the Profile settings section, it's possible to manage the extra assets of the profile under the "Schemas" section.
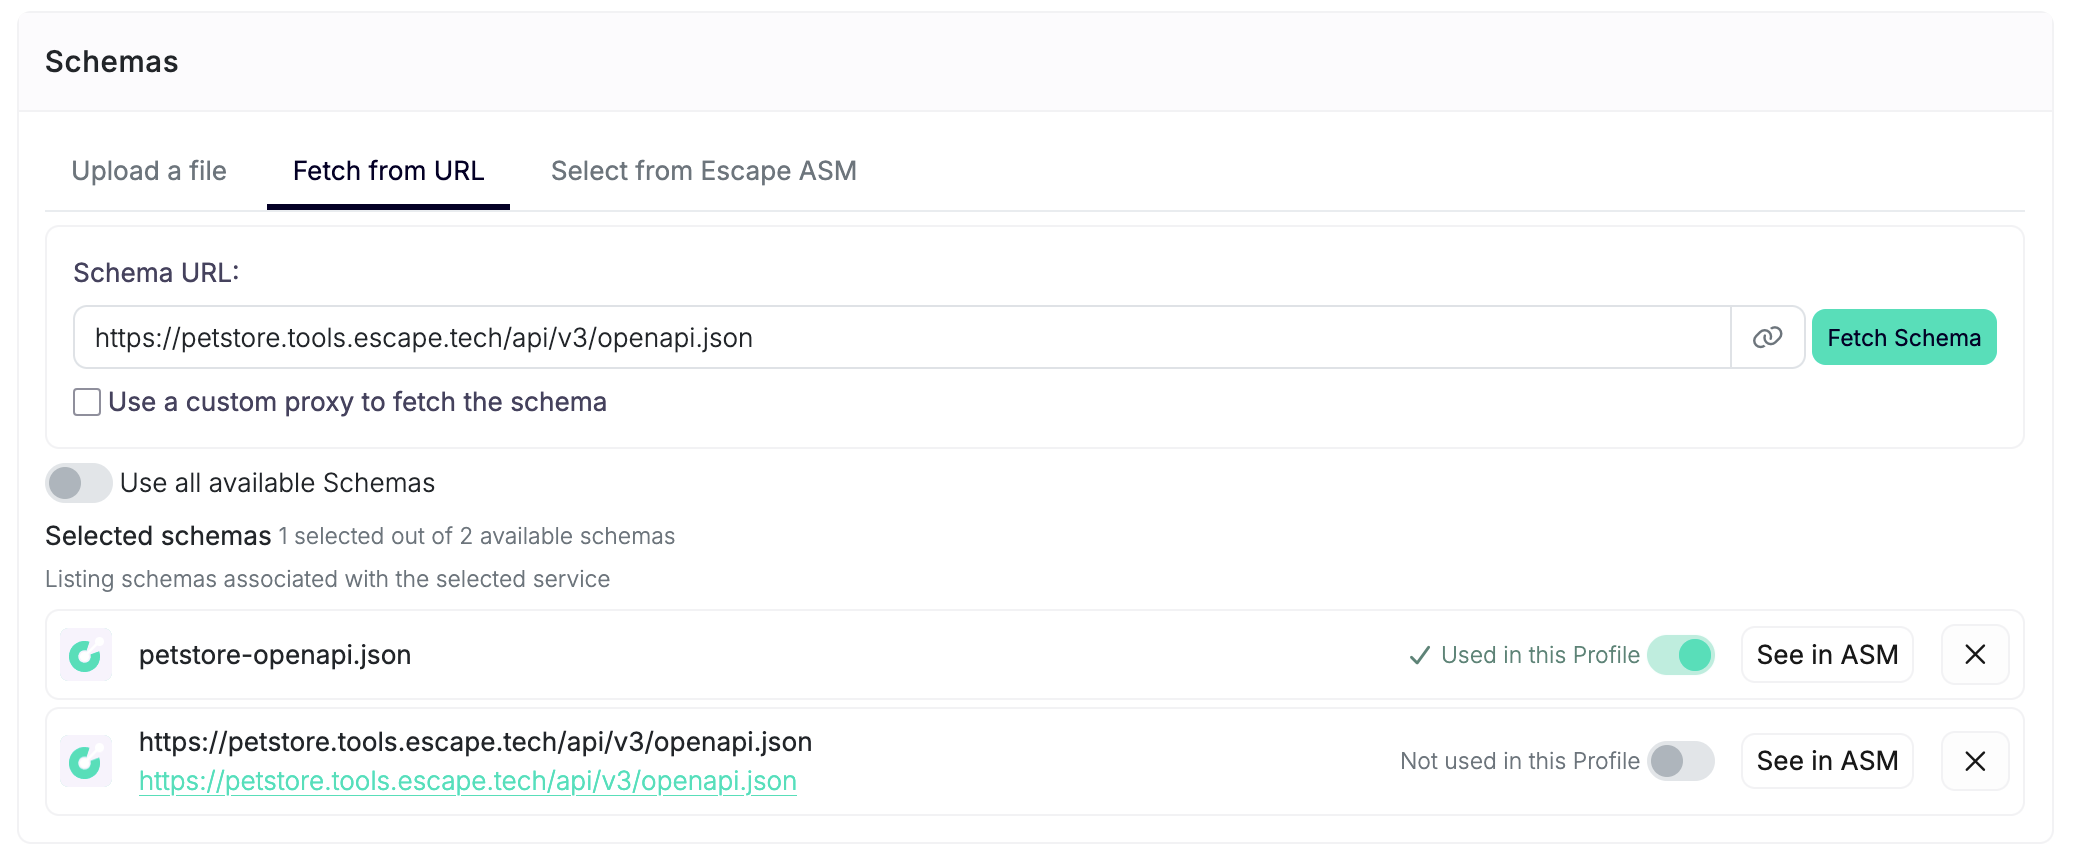
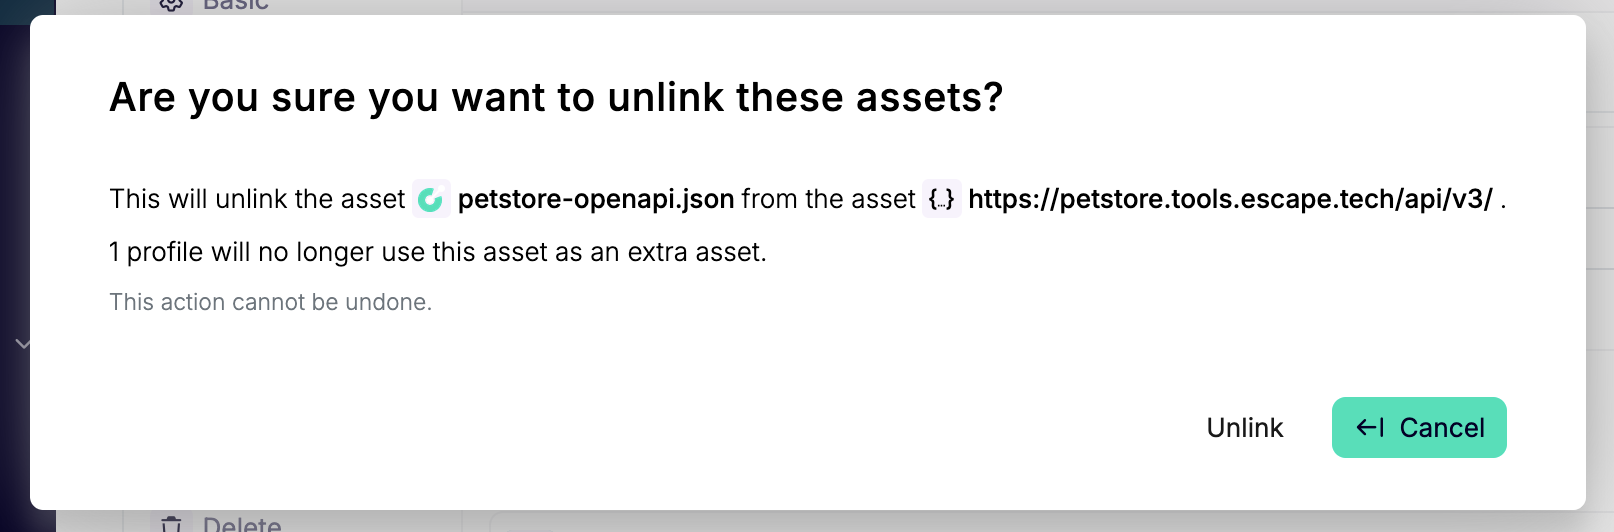
All features available during profile creation are also available here. It's also possible to unlink the extra assets from the target asset. This operation will require a confirmation and it will remove the asset from the extra assets of all the profiles scanning the target asset.
Using the API
Using the public API, it's possible to include extra assets on a profile by following these steps:
Get Signed URL
NOTE: more information about the route here: Get Signed URL
curl https://public.escape.tech/v3/upload/signed-url \
  --request POST \
  --header 'Content-Type: application/json' \
  --header 'Accept: application/json' \
  --header 'X-ESCAPE-API-KEY: <YOUR API KEY>'
you will receive a signed URL and an ID.
  {
    "url":"https://<bucket>.s3.<region>.amazonaws.com/11111111-1111-1111-1111-111111111111?X-Amz-Signature=<signature>",
    "id":"11111111-1111-1111-1111-111111111111"
  }
Upload the File
NOTE: we're using a schema file as an example.
Create the Asset
NOTE: more information about the route here: Create Schema Asset
Use the id received from the first step as your temporaryObjectKey.
curl https://public.escape.tech/v3/assets/schema \
  --request POST \
  --header 'Content-Type: application/json' \
  --header 'Accept: application/json' \
  --header 'X-ESCAPE-API-KEY: <YOUR API KEY>' \
  --data '{
  "asset_type": "SCHEMA",
  "upload": {
    "temporaryObjectKey": "11111111-1111-1111-1111-111111111111"
  }
}'
You will receive the newly created asset details in the response, including the permanent asset id:
{
  "id":"99999999-9999-9999-9999-999999999999",
  "class":"SCHEMA",
  "type":"OPENAPI",
  "name":"asset/schema/99999999-9999-9999-9999-999999999999",
  "createdAt":"2026-03-20T17:37:34.028Z"
}
Attach Schemas to a Profile
NOTE: more information about the route here: Attach Schemas to a Profile
Using the asset id from the previous step, update the profile. You can attach a single asset or multiple assets by passing a list of asset IDs in the extraAssetIds array.
curl https://public.escape.tech/v3/profiles/00000000-0000-0000-0000-000000000000 \
  --request PUT \
  --header 'Content-Type: application/json' \
  --header 'Accept: application/json' \
  --header 'X-ESCAPE-API-KEY: 00000000-0000-0000-0000-000000000000' \
  --data '{
  "extraAssetIds": [
    "11111111-1111-1111-1111-111111111111",
    "22222222-2222-2222-2222-222222222222",
    "33333333-3333-3333-3333-333333333333"
  ]
}'
Using the CLI
The Escape CLI wraps the same public API routes behind higher-level commands.
List the Extra Assets of a Profile
escape-cli profiles get surfaces the extra assets attached to a profile
directly in the main profile table, under the EXTRA ASSETS column (a
comma-separated list of extra asset IDs). The full list, including each
asset's name, class, type, status and creation date, is available via the
--extra-assets flag, or under the extraAssets field in JSON / YAML output.
# Pretty table
escape-cli profiles get 00000000-0000-0000-0000-000000000000

# Detailed pretty table of the extra assets only
#   columns: ID | CLASS | TYPE | STATUS | CREATED AT | NAME
escape-cli profiles get 00000000-0000-0000-0000-000000000000 --extra-assets

# Full extra-assets details as JSON
escape-cli profiles get 00000000-0000-0000-0000-000000000000 --extra-assets -o json
Upload a Schema and Create the Asset
The CLI bundles the "get signed URL" and "PUT to S3" steps into a single
upload schema command, then creates the permanent schema asset via
assets create.
# 1. Upload the schema file and capture the temporary object key
TEMP_KEY=$(escape-cli upload schema < ./schema.json -o json)

# 2. Create the permanent SCHEMA asset from that upload
ASSET_ID=$(echo "{\"asset_type\": \"SCHEMA\", \"upload\": {\"temporaryObjectKey\": $TEMP_KEY}}" \
  | escape-cli assets create -o json | jq -r '.id')

echo "Schema asset created: $ASSET_ID"
NOTE: the API and CLI link extra assets by ID. Existing assets don't need the upload/create step. For REST and GraphQL API definitions, use schema assets, and choose extra assets that match your scan type.
Attach Extra Assets to a Profile
Use profiles update with the --extra-asset-id flag. The flag accepts a
single comma-separated list of asset IDs, and each call replaces the
entire set of extra assets (mirroring the public API semantics).
# Attach a single extra asset
escape-cli profiles update 00000000-0000-0000-0000-000000000000 \
  --extra-asset-id "$ASSET_ID"

# Attach multiple extra assets at once (comma-separated)
escape-cli profiles update 00000000-0000-0000-0000-000000000000 \
  --extra-asset-id 11111111-1111-1111-1111-111111111111,22222222-2222-2222-2222-222222222222,33333333-3333-3333-3333-333333333333

# Detach every extra asset from a profile
escape-cli profiles update 00000000-0000-0000-0000-000000000000 --clear-extra-assets
End-to-End Example
Upload a fresh OpenAPI schema and attach it as an extra asset on an existing profile:
PROFILE_ID=00000000-0000-0000-0000-000000000000

TEMP_KEY=$(escape-cli upload schema < ./openapi.json -o json)

ASSET_ID=$(echo "{\"asset_type\": \"SCHEMA\", \"upload\": {\"temporaryObjectKey\": $TEMP_KEY}}" \
  | escape-cli assets create -o json | jq -r '.id')

escape-cli profiles update "$PROFILE_ID" --extra-asset-id "$ASSET_ID"

escape-cli profiles get "$PROFILE_ID"
Troubleshooting
Missing Assets in the List
If you don't see an asset in the list, it's likely because it isn't a definition asset of the target asset. To fix this, you can either create the asset on the fly, or link it to the target asset from the ASM.
It's possible to browse all the assets in the list by clicking on their "See in ASM" button.
Asset Creation Failure
If it isn't possible to create an asset from the provided file or asset definition, a card will notify of the error.
Review the error message and check the schema file or URL before trying again.